How to Bottle Beer – The Ultimate Guide
In this article, we will guide you through the process of how to bottle beer, giving you all the information you need to successfully bottle your own brews at home. You will learn about the equipment and ingredients required, as well as step-by-step instructions on how to sanitize, fill, and cap your beer bottles. We will also provide some tips and tricks to ensure that your bottled beer turns out just the way you want it. By the end of this ultimate guide, you will have the knowledge and confidence to bottle your own delicious beers like a pro.

The Ultimate Guide on How to Bottle Beer
Bottling beer is an essential step in the brewing process, as it allows homebrewers to store and enjoy their creations. While the process may seem daunting at first, with the right tools and knowledge, you can easily bottle your brews like a pro. In this ultimate guide, we will walk you through every step of the bottling process, from selecting the right bottles to properly storing and aging your beer. So grab a cold one and let’s get started!
Selecting the Right Bottles
Choosing the Bottle Type
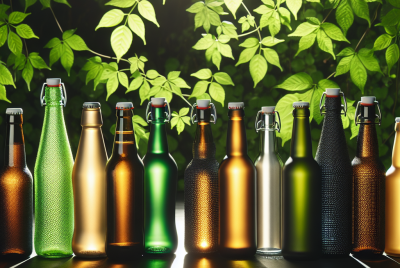
When it comes to selecting bottles for your beer, there are two main options: glass bottles and plastic bottles. Glass bottles are the traditional choice and are favored by many homebrewers for their aesthetics and ability to withstand the pressures of carbonation. Plastic bottles, on the other hand, are lightweight and shatterproof, making them a convenient option for those on the go. Ultimately, the choice between glass and plastic comes down to personal preference.
Determining the Bottle Size
The next consideration is the size of the bottles. The most common sizes are 12-ounce and 22-ounce bottles, but you can also find smaller and larger options. The size you choose will depend on how much beer you plan on bottling and how you intend to consume it. If you enjoy sharing your beer with friends or entering competitions, smaller bottles may be the way to go. However, if you prefer to savor your brews over a longer period of time, larger bottles might be more suitable.
Ensuring the Bottles are Clean and Sanitized
Before bottling your beer, it is crucial to ensure that your bottles are clean and sanitized. Any residual dirt, bacteria, or yeast can ruin the flavor and quality of your brew. To clean your bottles, start by soaking them in warm water and a mild detergent. Use a bottle brush to scrub away any residue, paying extra attention to the bottom and neck of the bottles. Rinse thoroughly to remove any soap residue.
After cleaning, it is time to sanitize your bottles. There are several sanitizing solutions available on the market, such as iodophor or Star San. Follow the instructions on the package to mix the solution, and then soak your bottles for the recommended amount of time. Once the bottles have been properly sanitized, rinse them with hot water and allow them to air dry.

Preparing the Bottles
Cleaning the Bottles
Cleaning the bottles is the first step in preparing them for the bottling process. As mentioned earlier, soak the bottles in warm water and a mild detergent to remove any dirt or residue. Use a bottle brush to scrub the inside of the bottles, paying close attention to the bottom and neck. Rinse the bottles thoroughly to ensure that no soap residue remains, as this can negatively affect the taste and quality of your beer.
Sanitizing the Bottles
After cleaning, it is crucial to sanitize your bottles to eliminate any bacteria or yeast that could potentially contaminate your brew. Sanitizing solutions, such as iodophor or Star San, are highly effective at killing microorganisms. Follow the instructions on the package to mix the sanitizing solution, and then soak your bottles for the recommended amount of time. Once the bottles have been sanitized, rinse them with hot water and allow them to air dry.
Drying the Bottles
Properly drying your bottles is essential to ensure that no moisture remains, which could lead to bacterial growth or mold. After rinsing your bottles, place them upside down on a clean drying rack or a sanitized surface. Allow them to air dry completely before moving on to the next step of the bottling process.
Priming the Beer
Understanding Priming
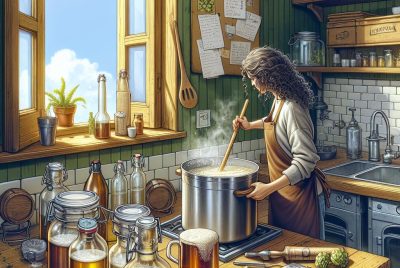
Priming is the process of adding a small amount of sugar to the beer just before bottling. This sugar will ferment inside the sealed bottles, producing carbon dioxide and creating the carbonation in your beer. It is important to choose the right type and amount of priming sugar to achieve the desired level of carbonation.
Calculating the Correct Amount of Priming Sugar
To determine the correct amount of priming sugar for your beer, you will need to consider several factors, including the style of beer, desired level of carbonation, and temperature. There are online calculators and brewing software available that can help you determine the appropriate amount of priming sugar based on these factors.
Mixing the Priming Sugar
Once you have calculated the correct amount of priming sugar, dissolve it in a small amount of boiling water. Stir until the sugar is completely dissolved, and then let the solution cool to room temperature. Make sure to sanitize any utensils used during this process to prevent contamination. Once the priming sugar solution has cooled, it is ready to be added to your beer.

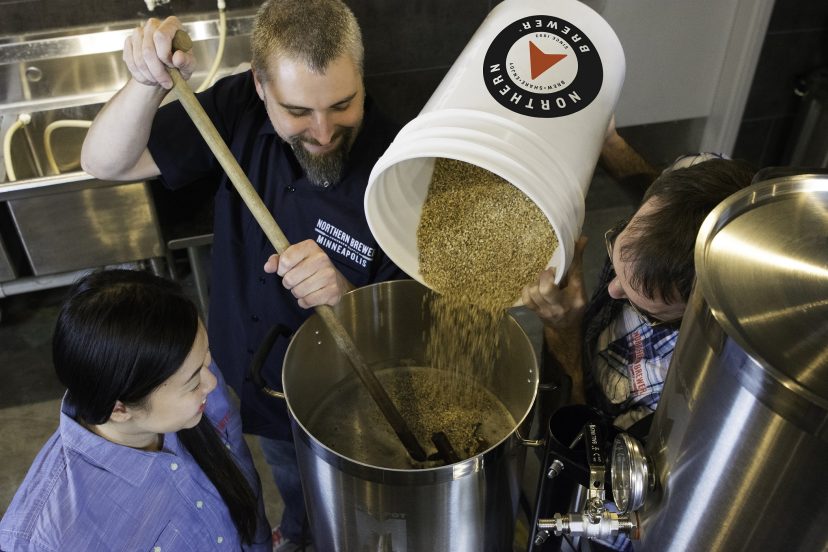
Transferring the Beer
Siphoning the Beer
Transferring your beer from the fermenter to the bottles can be done using a siphoning method. A siphoning tube and racking cane are commonly used to make this process easier. Start by sanitizing these tools to ensure cleanliness. Place the racking cane into the fermenter, making sure it is positioned above the sediment layer. Place the other end of the cane into a sanitized bucket or container, which will be used for bottling.
Avoiding Sediment Transfer
When siphoning the beer, it is important to avoid transferring any sediment that has settled at the bottom of the fermenter. This sediment, known as trub, consists of leftover yeast and other particles. To minimize the transfer of sediment, angle the racking cane slightly above the trub layer, allowing only the clear beer to be siphoned into the bottling bucket.
Using a Bottling Wand
A bottling wand can make the bottling process much easier and minimize the risk of spillage. Attach the bottling wand to the end of the siphoning tube, and then turn on the flow of beer. Simply touch the bottom of the bottle with the wand to start the flow, and the beer will automatically stop once the bottle is filled to the desired level. This tool helps to reduce oxidation and maintain a consistent fill level across all the bottles.
Filling the Bottles
Positioning the Bottles
Before filling the bottles, set them up in a position that allows for easy access and efficient filling. Some homebrewers prefer to use a bottle tree, which holds the bottles upside down, while others simply arrange the bottles on a clean and sanitized surface. Ensure that the surface or bottle tree is stable to prevent any spills or accidents.
Using a Bottle Filler
A bottle filler is a practical tool that makes the filling process faster and more precise. Attach the bottle filler to the bottling wand and insert it into the bottle. Gently press the bottle filler against the bottom of the bottle to start the flow of beer. As the beer fills the bottle, slowly lift the bottle filler to maintain the appropriate headspace, typically about an inch from the top of the bottle.
Avoiding Overfilling or Underfilling
It is important to avoid both overfilling and underfilling the bottles. Overfilling can lead to excess pressure and potential bottle explosions, while underfilling may result in inadequate carbonation. Using a bottle filler and paying attention to the headspace will help ensure that your bottles are filled to the correct level.

Capping the Bottles
Choosing the Right Bottle Caps
Selecting the right bottle caps is crucial for maintaining the carbonation and freshness of your beer. Crown caps, which are the most common type, are made of metal and require a bottle capper to seal them securely. Make sure to choose caps that are compatible with your chosen bottle type and capping tool.
Using a Bottle Capper
A bottle capper is an essential tool for securely sealing the caps onto the bottles. Place a sanitized crown cap onto the filled bottle, ensuring that it is centered. Position the bottle under the capper and press down firmly to seal the cap onto the bottle. Repeat this process for each bottle until all have been properly capped.
Ensuring Proper Sealing
After capping, check each bottle to ensure that the caps are securely sealed. Gently press down on the center of the cap to confirm that it is properly seated. A properly sealed cap should not move or make any sound when pressed. Any bottles with loose caps should be recapped or consumed first to prevent any loss of carbonation.
Labeling and Storage
Designing and Applying Labels
Labeling your bottles not only adds a personal touch but also helps you identify and organize your beers. Consider designing custom labels that reflect the style and name of each beer. There are various label-making software and templates available online that can simplify this process. Once you have your labels printed, simply apply them to the bottles, making sure they are properly aligned and adhere securely.
Organizing and Storing the Bottles
Once your bottles have been labeled, it is important to organize and store them properly. Place the bottles in a cool, dark, and stable environment, such as a cellar or a dedicated beer fridge. Avoid exposing the bottles to direct sunlight or extreme temperature fluctuations, as these can negatively impact the flavor and quality of your beer. Consider using storage racks or boxes to keep the bottles organized and protected.
Aging and Conditioning the Beer
After bottling, it is recommended to let your beer age and condition for a certain period of time. This process allows the flavors to meld and the carbonation to fully develop. The ideal aging time will depend on the style of beer and personal preference. Lighter styles may require a shorter aging period, while stronger, more complex beers may benefit from longer aging. It is recommended to store your beer for at least two weeks before enjoying the first bottle.

Cleaning Up
Cleaning and Sanitizing Equipment
Cleaning and sanitizing your equipment after bottling is essential to maintain hygiene and prevent contamination in future brews. Clean any tools, such as the bottle filler, bottle capper, and siphoning equipment, with warm water and a mild detergent. Rinse them thoroughly and sanitize them using the appropriate sanitizing solution. Allow the equipment to air dry completely before storing it for future use.
Proper Waste Disposal
Dispose of any waste from the bottling process properly. Empty bottles, bottle caps, and any unused priming sugar should be recycled or discarded according to local waste management guidelines. Avoid pouring excess priming sugar or beer down the drain, as it can cause clogs and potentially harm the environment. Consider composting any organic waste, such as sediment or trub, if possible.
Maintaining a Tidy Brewing Space
After cleaning up, it is important to maintain a tidy brewing space to ensure a smooth bottling process in the future. Store your brewing equipment, such as fermenters, airlocks, and tubing, in a clean and organized manner. Regularly clean and sanitize your brewing area, including countertops, sinks, and any other surfaces that come into contact with your beer. This will help prevent any potential contamination or off-flavors in your future brews.
Troubleshooting and Tips
Dealing with Carbonation Issues
If you encounter carbonation issues, such as overcarbonation or undercarbonation, it is important to identify and address the underlying cause. Overcarbonation can result from adding too much priming sugar or from an incomplete fermentation process. On the other hand, undercarbonation may occur if insufficient priming sugar was added or if the bottles were not properly sealed. Consult brewing resources, such as books or online forums, for guidance on how to troubleshoot carbonation issues specific to your situation.
Preventing Bottle Bomb
Bottle bombs, or exploding bottles, are a serious issue that can occur if too much pressure builds up inside the bottle. To prevent bottle bombs, ensure that you calculate and add the correct amount of priming sugar, leave sufficient headspace when filling the bottles, and use properly sealed caps. Proper cleaning and sanitizing practices are also crucial in preventing contamination, which can contribute to excessive carbonation and potentially lead to bottle bombs.
Best Practices for Bottling
To ensure a successful bottling experience, consider implementing the following best practices:
- Plan ahead and gather all necessary tools and ingredients before starting the process.
- Take your time and work methodically to avoid potential mistakes or spills.
- Keep a record of your brewing and bottling process, including the type of beer, dates, and any specific instructions or adjustments made.
- Store your bottled beer at the correct temperature and avoid handling or moving the bottles excessively to prevent disturbance of the sediment.
Conclusion
Bottling your own beer can be a rewarding and enjoyable experience. By following this ultimate guide, you now have the knowledge and confidence to select the right bottles, properly prepare them, and go through the entire bottling process with ease. Remember to pay attention to cleanliness and sanitation, calculate the correct amount of priming sugar, and be mindful of proper sealing techniques. With practice and patience, you will be able to produce consistently great-tasting beers that you can proudly share with friends and family. So grab a bottle, sit back, and enjoy the fruits of your labor!